

Cable tension dos and don'ts
Posted by Dave on Jun 29th 2022
A few weeks ago, we published a post about steering cable tension (link) which has proven to be remarkably popular and useful. The photo at the bottom of that post shows the tightening nut installed with the second nut correctly installed as a locking nut. As I've looked at more and more steering installations this season, this apparently deserves a specific call out.
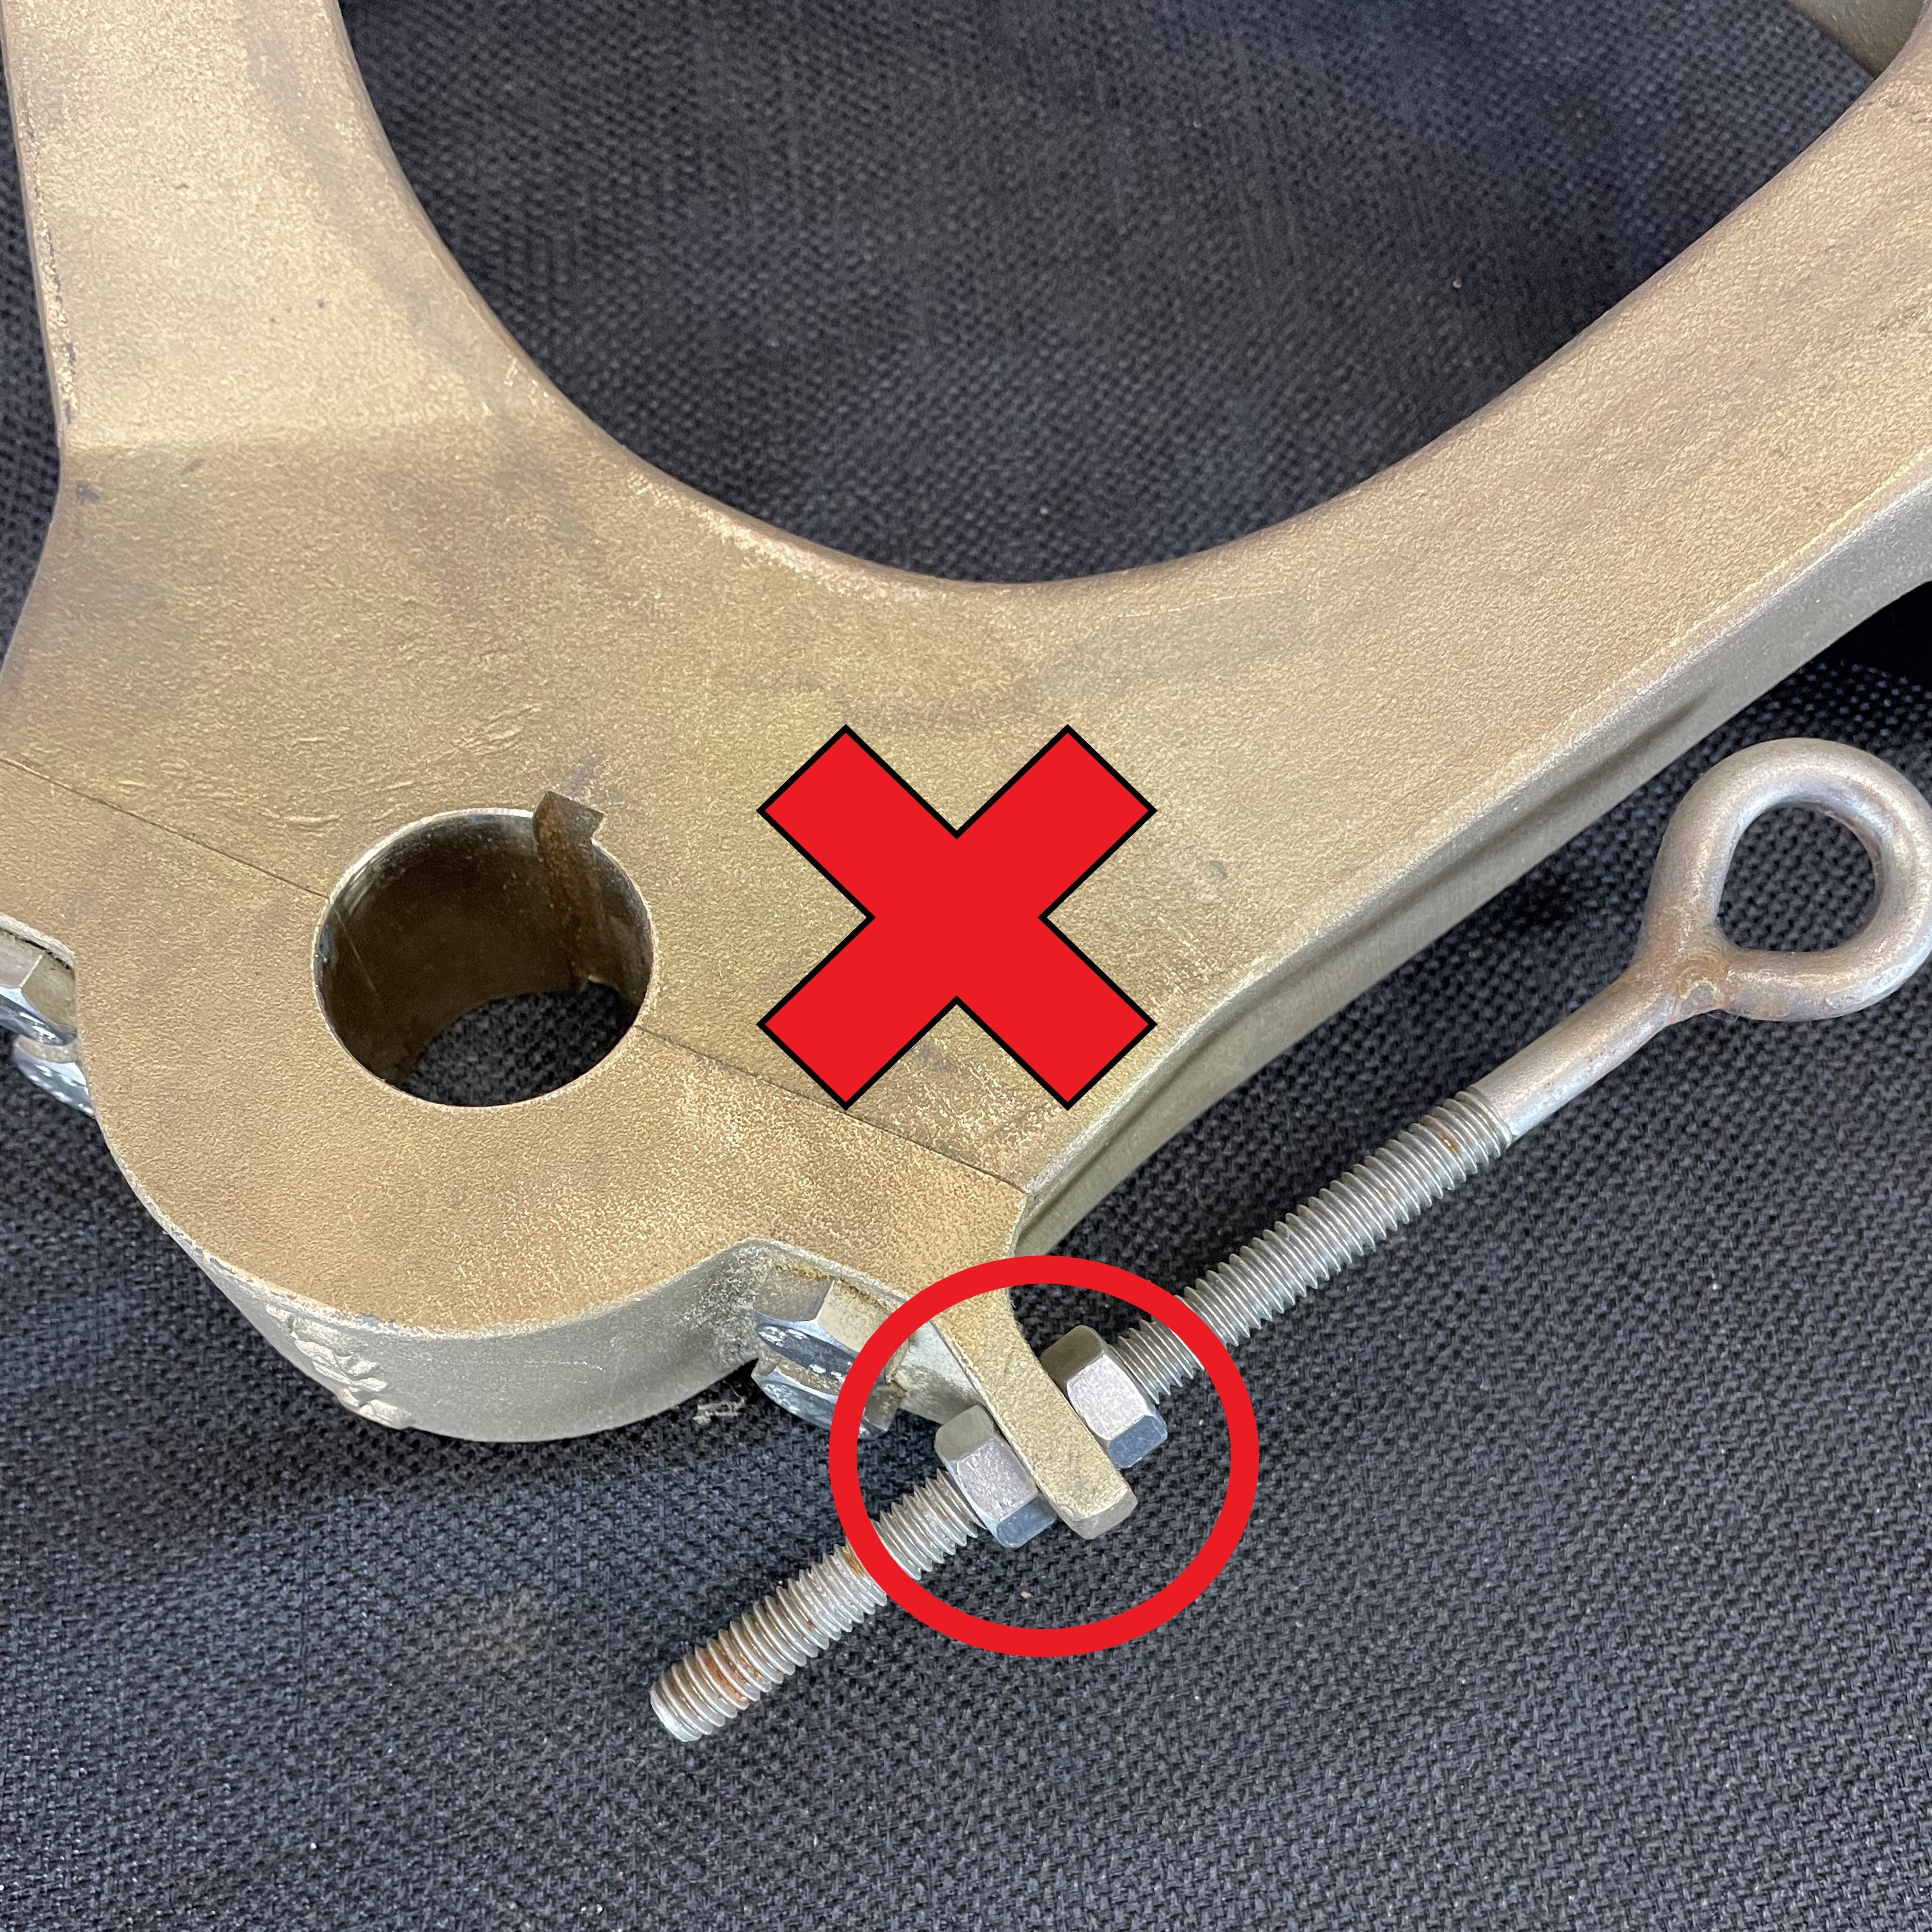
This photo shows an incorrect but very common installation of the tensioning hardware nuts. It also shows an old tensioning eye that would need to be replaced but we'll leave that aside for now. Many people take this as the correct installation as putting the nuts on opposite sides of the quadrant tab sort of makes sense. The eye bolt is held securely through the hole in the tab, and it seems right...
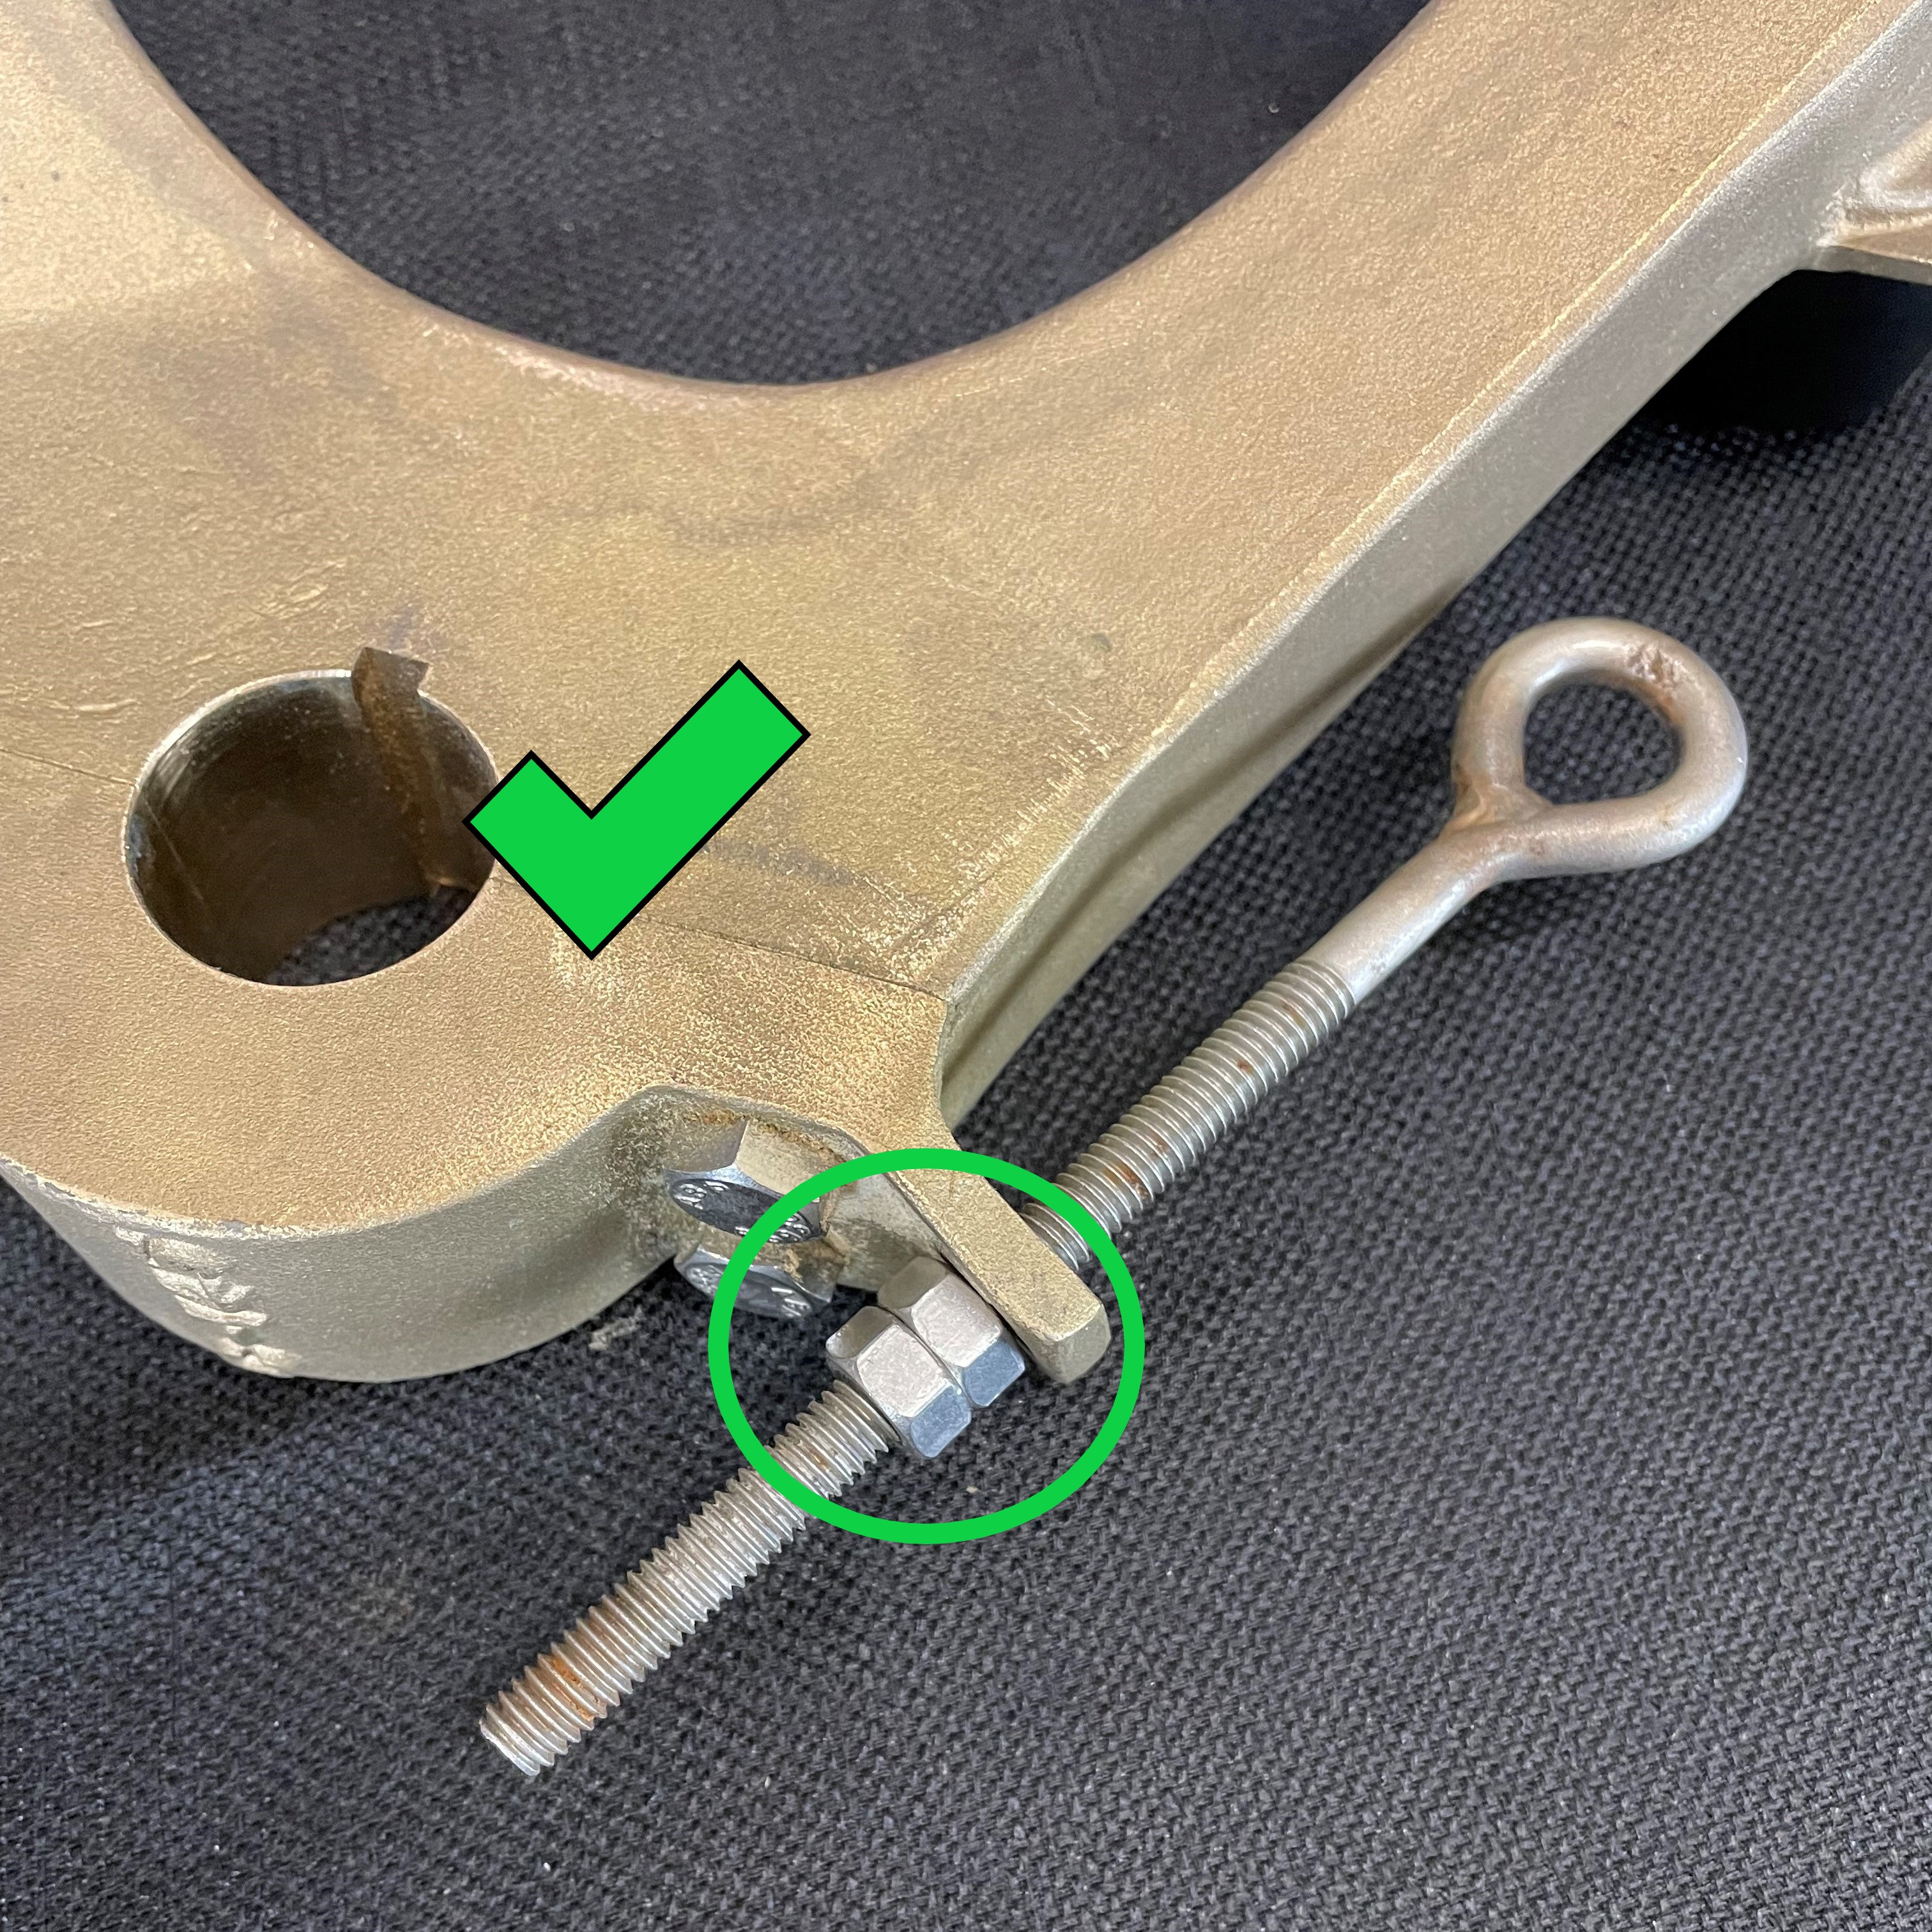
But perhaps counterintuitively, this is actually the correct installation, with both nuts on the back side of the quadrant tab. The first nut, up against the tab, sets the tension. When you're making your cable tension adjustments, you can leave the second nut completely off or just have it be a few threads away from the first nut - enough that the wrench you use for tightening the first nut stays clear of the second one.
When you get the cable tension just where you want it, then you tighten the second nut right up to the first, and that locks it in place.
People often ask why we use plain and not Nylok or other locking nuts in this system. The reason is that the drag of a locking nut makes accurate adjustment of the tension a pain in the butt, and for whatever reason it's easy for people to get cross-threaded with lock nuts. Thread lock compounds work well to get the nut locked in place, but can be difficult to remove and need to be reapplied after an adjustment. The second nut used as a locking nut is an easy and proven way to keep a nut securely locked in place.
You may be thinking "whoa - you mean I have to take the cable off and remove the eye just to get this sorted out the right way?!?!" That's how it looks, but fortunately you have an easy out on this one. Just take the nut that's on the eye side of the quadrant tab and back it off (toward the eye) and get yourself another 316 stainless nut from the hardware store (most of you will have 5/16 eyes, so a 5/16 nut) and spin that on as the locking nut. Easy peasy.
Have a wonderful and safe Fourth, hopefully with a heaping dose of time on the water.