

Replacing wire steering cable with Dyneema part 2 - the install
Posted by Dave on May 19th 2022
Having successfully removed the existing chain and wire in the last post, the task fell to measuring chain and cable, and making a new chain and new Dyneema cables. Measuring the chain is easy enough, as the J/109 uses Edson's steering chain and cable kit # 77103 (link), and so has an 18" chain. The cable is a bit thornier, but we'll get to that.
Installing the chain is just as you would do it with wire cable - easy peasy, just make sure that the chain length is equidistant on both sides of the sprocket with the rudder centered, and lightly apply the wheel brake so the chain doesn't cascade off of the spinning sprocket as soon as you touch one cable side (been there, done that). I pre-coated the chain with a nice coating of Edson's Chain Care+ in order to ensure that it's well protected right from the get-go.
The J/109's pedestal gives you an assist on leading the cables down and into the base idler, in that it has an inspection port about halfway down the aft face. If you have spaghetti arms like I do, this is enough access to get in there and feed the cable lashing tail through the appropriate base idler hole. If your boat doesn't have this nice feature, a length of wire coat hanger e-taped to the lashing tail can be a great help as a pilot.
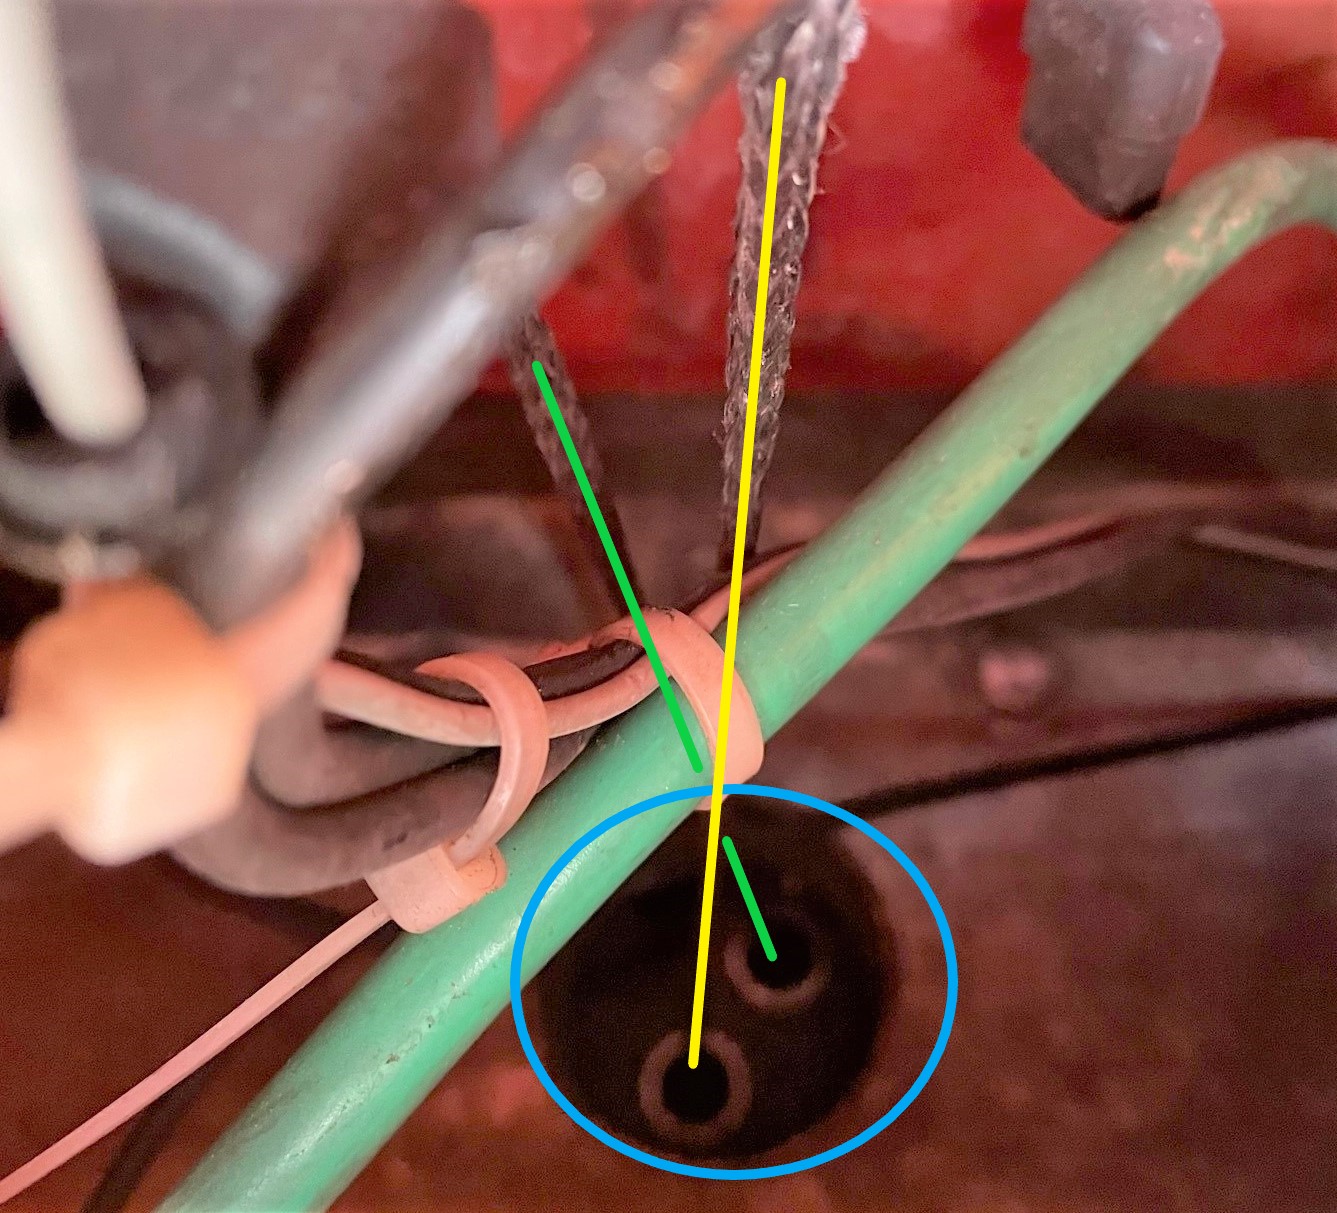
Because the J/109 has a radial, which for the purposes of chain pull acts like an aft-facing quadrant, the cables need to be crossed. So it has a crossed-wire base idler (link). The blue circle in the photo above shows the ports that the cables need to go through, and the green and yellow lines show the cables as they cross each other (please excuse the MFD cable ruining my photo) - the green line shows the cable coming off the port side of the sprocket and to the forward/starboard idler port, and the yellow line shows the path of the cable coming off the starboard side of the sprocket and down through the port/aft idler port. The fore/aft offset of the ports allows clean cable crossing.
If you forget to cross the cables when you should, or you cross them when you shouldn't, then when you turn the wheel to starboard the boat will turn to port and won't that be a big surprise! (believe it or not, never been there or done that). If the cables attach to the quadrant/radial on the aft side of the post, you cross the cables.
One of the wonderful things about using cable clamps with our chain and cable kits (link) is that the extra length of cable makes it somewhat easier to install the cable - it gives you some tail to grip as you tension the cable and work the clamps into place as you can see in this video (link). This means that any amount longer than "long enough" is fine, as you can just get rid of the extra tail. With Dyneema, because of the spliced ends, you need to be a bit more exact. To give a nice range of adjustment, we use thin 2.5mm Dyneema lashing tails.
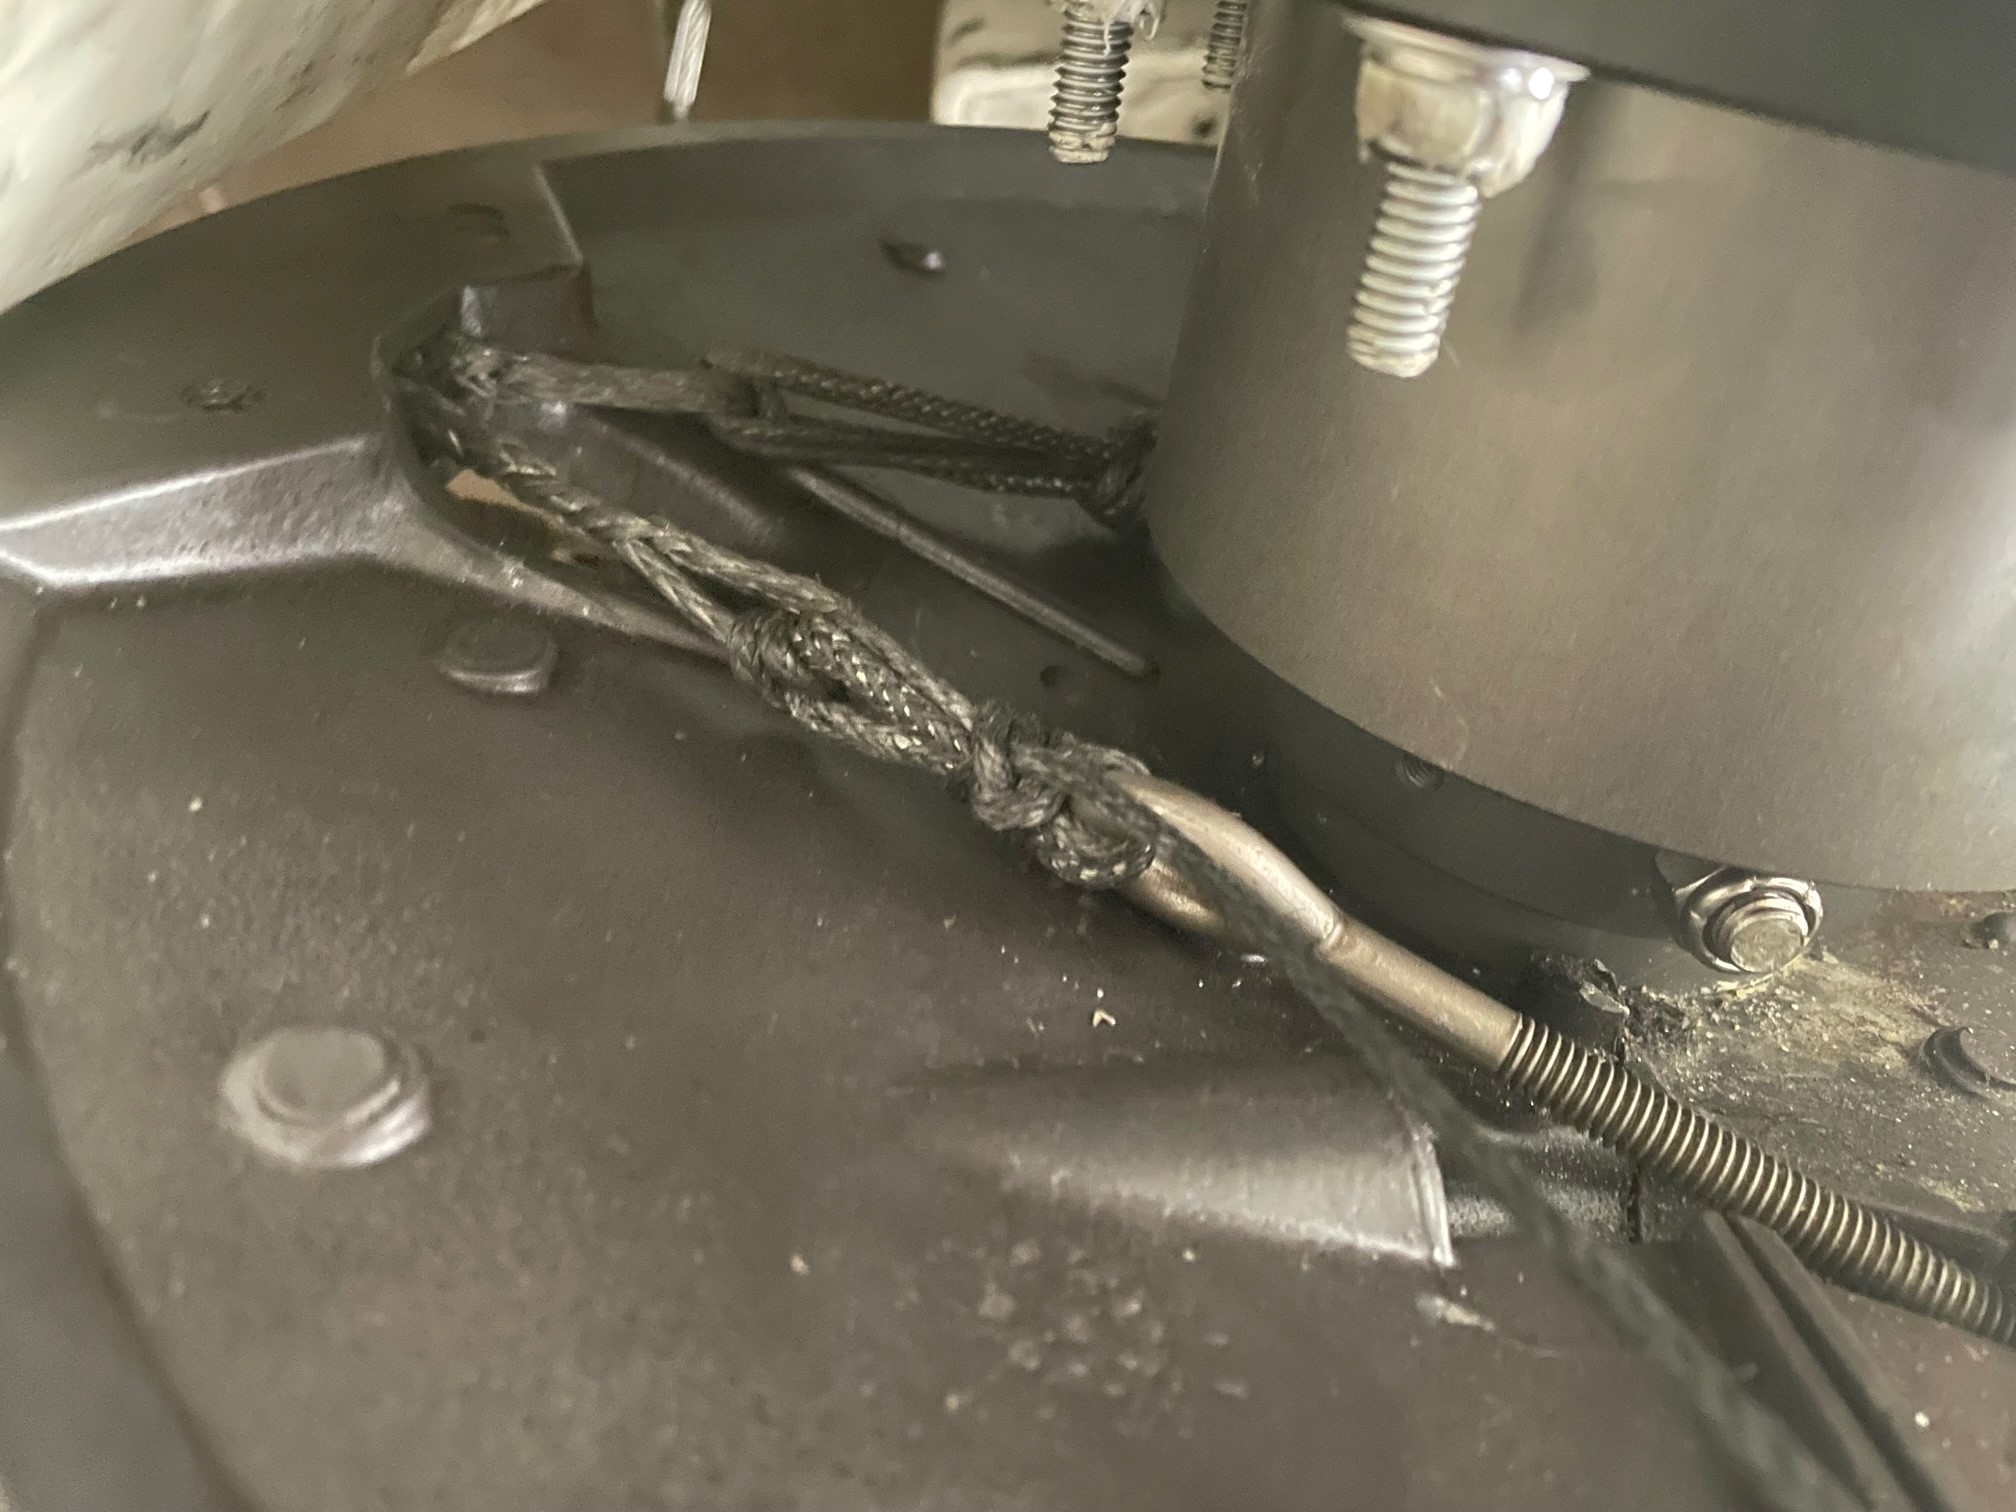
This photo shows the 2.5mm lashing tail with 2 full loops between the cable's spliced eye and the adjuster eye bolt. The eye bolt is adjusted to have a lot of range left in its throw for later tensioning, but I lashed those loops firmly. You don't worry about putting too much tension on at this stage - get it tight! Also, this lashing line has a 1200 pound minimum breaking load, which with 2 full loops means that the rudder post will probably give out before the lashing does.
This photo also shows the need for precision in cable length. This cable could have been about an inch shorter or longer than it is and still worked great, but much more than that on either side would have been a problem. So we have about a 3" resolution window to get this right. If you want to do a Dyneema cable setup before we have a kit configured for your boat, measuring is not too hard. As you disconnect your old steering cables, the wires will have a pronounced turn at the bearing point. If the old cable was tightened correctly with some range still on the eyebolt, the measurement between the bearing points at the chain and eye bolt is the measurement we need to create custom cables for you.
The good news is that the lashing is, in my opinion, quite easier than using cable clamps. Friction within the lashing holds the lashing in place as you do your hitches, so you don't lose much tension when you release after pulling tight. The small bit of difference you see in the position of the two spliced eyes here is down to the difference in the cable run created by the crossed idler ports, and that I'm one tooth off of center on the sprocket. The chain has well more than enough throw to accommodate that.
From this point, once both cables are lashed on, you just do balanced turns on the eye bolt nuts (two turns on the right, two turns on the left, etc) and get the cables pretty darn tight. The Dyneema cables are, for all intents and purposes, zero stretch and the splices are tension-set here when we make them, but the lashing hitches do settle a small bit and so the cables will loosen up a tiny bit initially. There's still a ton of throw to be able to add additional tension if needed.
Not everyone will want or need Dyneema cables, but they do present the advantages of corrosion resistance, easier motion across the sheaves, lighter weight (hey - I've done races on boats with the cut-down toothbrush protocol), and in my opinion an easier attachment to the quadrant or radial. We'll be populating the store with kits for each boat as we measure and confirm them.
Whether you choose Dyneema or wire, chain and cable maintenance is a crucial part of your boat's steering's health.